


I’m a math guy. Always have been. Numbers and formulas come easy to me. But Google Analytics… ? Not so much. Why’s it gotta be so dang hard to use? Don’t even tell me it’s not hard for you… I’m pretty good at this kinda stuff and it took me a while to figure it all out. Mainly because no one took the time to really put together a step-by-step guide for beginners. That’s exactly what this is.
Setting Up Your Google Analytics Account Correctly
First of all, if you don’t have a Google Analytics account, create one now. You can sign in using any one of your Google Accounts or you can create a new one. Once you’re signed in you’ll see the following screen…
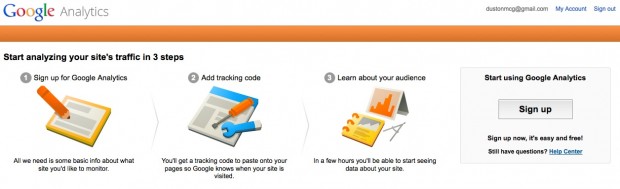
Click the ‘Sign up’ button and you’ll be taken to the page below where you can choose a tracking method.
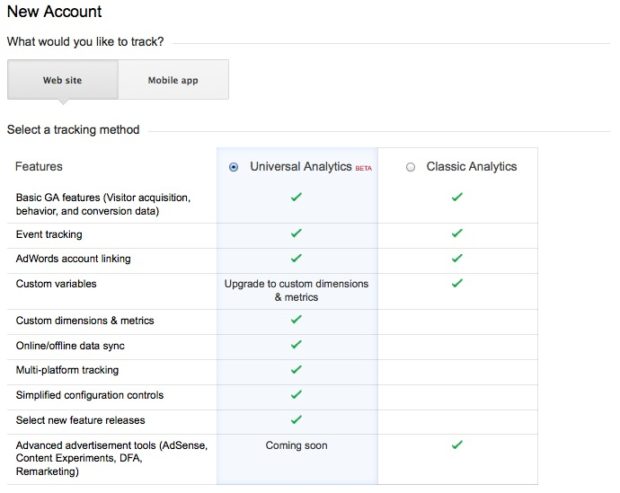
I actually suggest using the Classic Analytics method. I’ve tried the Universal Analytics method but noticed it wasn’t very accurate. It wasn’t reporting sales that I knew I made. So, stick with the Classic Analytics method for now. You can always upgrade later.
Next, you’ll need to enter some info about your site…
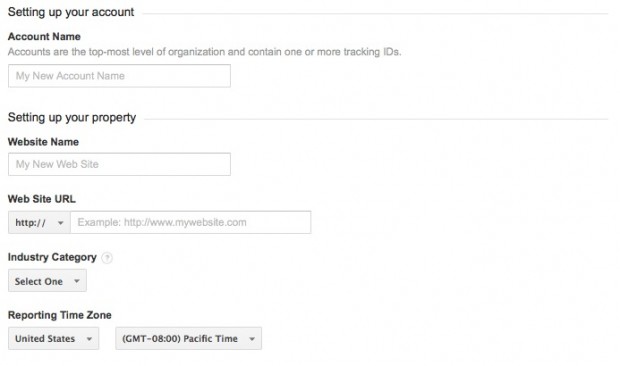
Your ‘Account Name’ can be called anything. You may want to be descriptive if you plan on tracking multiple sites across multiple accounts.
For ‘Website Name’, enter something to describe the site so you can distinguish which site is which inside your dashboard. ‘Web Site URL’ is pretty self-explanatory (be sure you include the www). Then, choose a category that’s closely related to your site, choose your country and set the time zone.
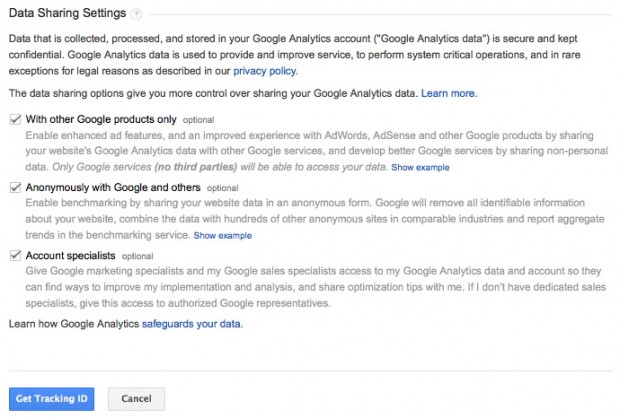
You can then leave the ‘Data Sharing Settings’ as is and click the ‘Get Tracking ID’ button…
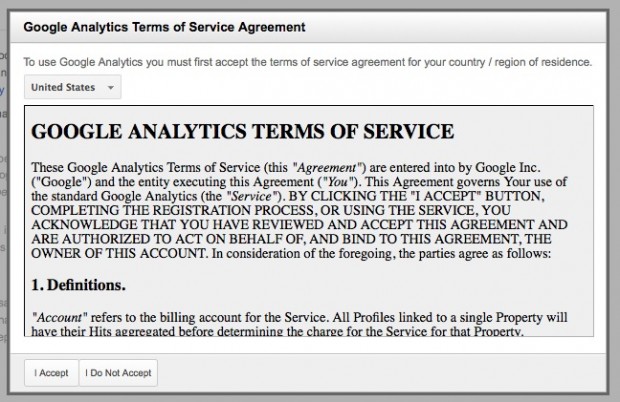
Accept the Terms of Service…
And you’re taken to your new Google Analytics dashboard. If you scroll down you’ll see a box like the one below that says, “This is your tracking code. Copy and paste it into the code of every page you want to track.”
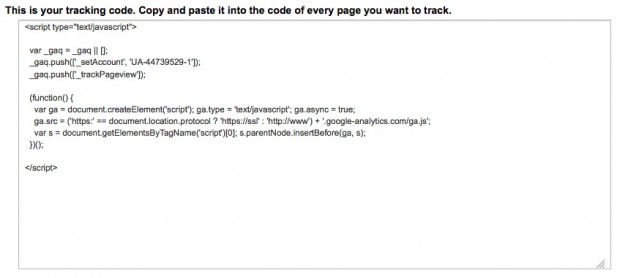
You’ll need to copy this code and paste it into the HTML of every single page you want to track. That means any page on your site that you’ll ever want tracking info on, needs to have this code in it.
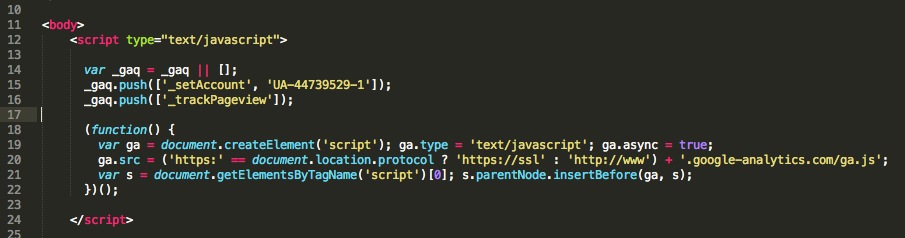
Google suggests placing it immediately after your opening body tag like so…
That sounds like a lot of work, right? Pasting it into every single page on your site?? Yeah, it is a lot of work. I’ve done it manually before on our old HTML site that had over 130 pages. Definitely no fun. But if your site is running on WordPress, you’re in luck!
You have a few different options for installing your tracking code on every single page of your site instantly.
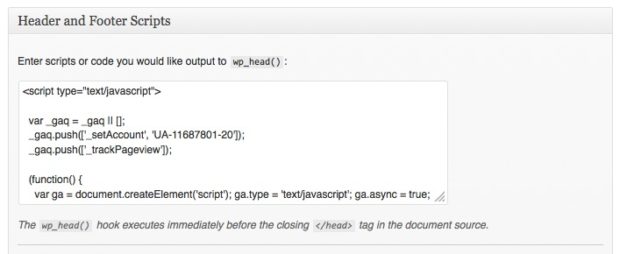
- Check your theme options… a lot of times themes will include a spot to add ‘Header and Footer Scripts’ like the image below…
- Install a plugin like Google Analytics for WordPress.
- Manually insert your tracking code into your theme’s header.php file (only suggested for advanced users)
Now you’ve successfully setup your Google Analytics account and your tracking code is installed and ready for use.
Setting Up Goals
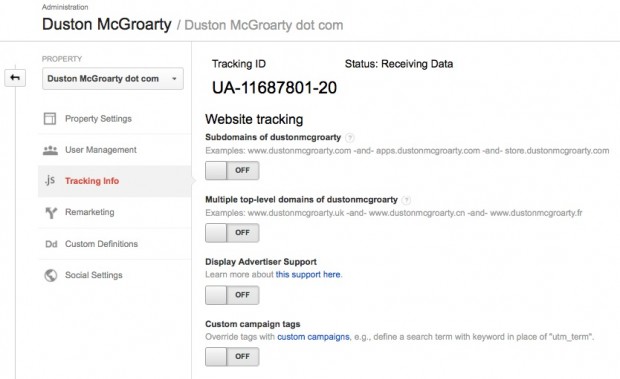
The next piece of business is to setup your goals inside your analytics account. If you’re still in your admin screen where your tracking info is, you’ll see a little arrow pointing to the left on the left side of the drop down box, like it shows in the image below…
Click that arrow and you’ll be taken to a screen that looks like this…
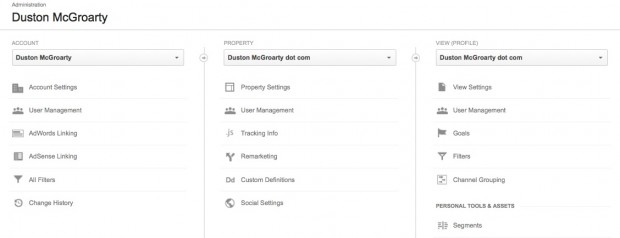
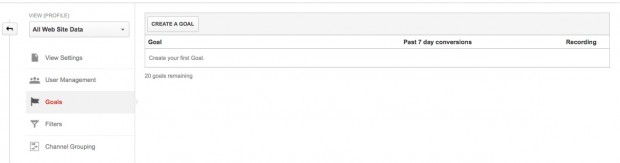
Under the ‘View Profile’ column to the right you’ll see an option for Goals. Click Goals and you’ll be taken to a page where you can create your website goals. Click the Create A Goal button to create your first goal…
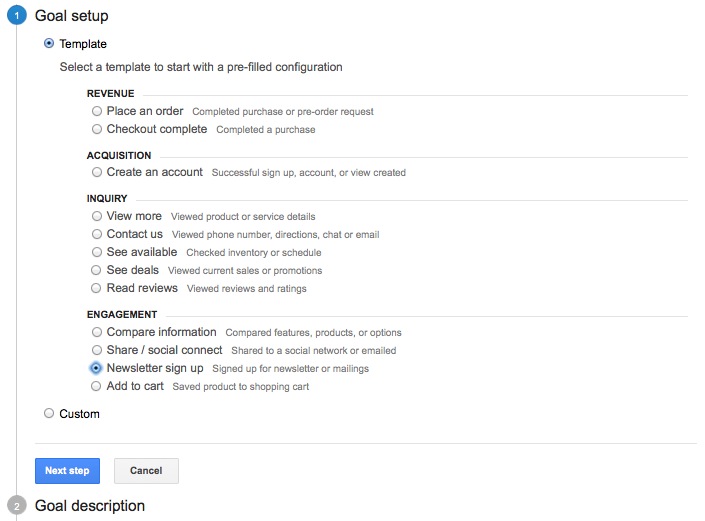
You’re given a slew of different options you can choose from to get you started. Anything from Place an order to Create an account or Newsletter sign up. For this example, I’ll choose Newsletter sign up and click the blue Next step button..
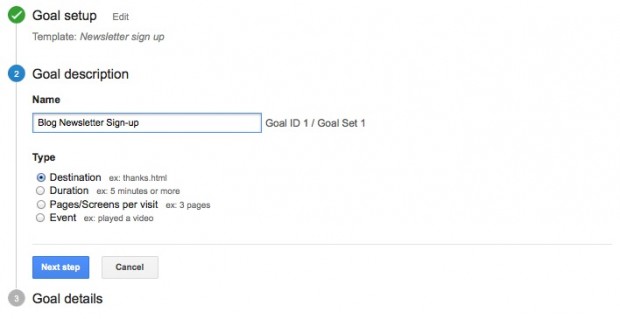
In Step 2, the Goal Description step, you can name this goal anything you choose. I’ll name mine Blog Newsletter Sign-up. It’s good to be descriptive here in case you have multiple places where visitors can join your newsletter list.
The second part of this step asks which type of goal this will be (basically, how will you know the goal was successful). For my example of a newsletter sign-up, the easiest way to track successful sign-ups is by using a Destination. Since all newsletter subscribers are sent to a “thank you page” after joining the list, I can use that “thank you page” as my Destination URL. Once you’ve completed Step 2, click the blue Next step button.
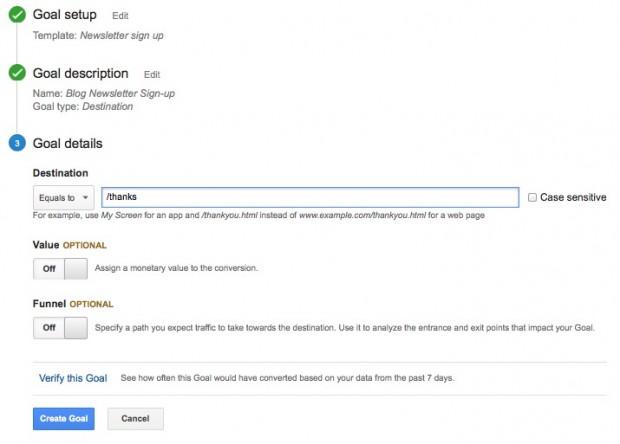
Step 3 asks for a few more Goal Details. Since I chose Destination as my type, I am now asked which page I’d like to use as my Destination URL. Notice the note below the box… it says to only include the end portion of the URL, not the full URL.
If you were tracking sales, the next option allows you to add a value in for the goal. So if your product sells for $37, you would put $37 in for the value. You can also include the goal in a funnel you already created.
Once you’re done with Step 3, click the Create Goal button.
You just created your first goal! You should now be able to see the goal you just created from your Goals page like the image shows below…

The hard part is over. Now, all you need to do is figure out what exactly you want to track. Maybe you want to see how many newsletter sign-ups you get from a Facebook ad you’re running. Maybe you want to see what kind of conversions you can get from a solo ad you’re about to send out. Or maybe you want to test a few banner ads on your blog to see which one gets the most sign-ups.
Whatever you choose, it’s now possible with Google Analytics and your newly created goal.
Get a Tracking Link Using the Google Analytics URL Builder
This was the hardest concept for me to wrap my head around. I had always seen guys using these “UTM” links in their campaigns but never really knew what they were for.
These tracking links are used when you’re sending traffic somewhere and you want to track conversions using Google Analytics. You could be sending traffic from your email list, from a banner on your blog, from a solo ad, from a Facebook ad or from just about any place online.
The tracking links consist of 6 parts, 4 are required. You’re really just taking the URL where you want to send traffic to and adding some variables to the end of it. These variables describe your campaign so you can tell exactly which ads and campaigns are resulting in the most money (or sign-ups in my example).
So, how do you build one of these URL’s? Well, that’s easy… Google provides you with a tool that does it for you. All you need to do is fill in the blanks.
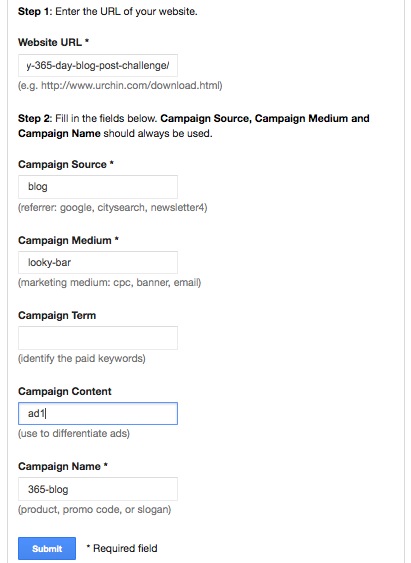
I know that image above is hard to read but if you head over to the URL Builder you can see it’s pretty straight-forward. Enter your desired URL you want traffic to go to, choose a campaign source, a campaign medium and a campaign name. You should realize, you can enter anything you want here. They give you suggestions but these entries are really for your benefit, not Google’s.
Whatever you enter here you’ll be able to see inside your Google Analytics account after your link starts to receive clicks. Once you’ve filled in at least the required fields in the URL builder, click the Submit button. Now you should see your tracking link that includes all of the campaign info you entered above.

This is the link you use in your promotions. When someone clicks this link whether it’s from an email you send out, from a banner on your site or from an ad elsewhere, they’re taken to your offer page and your analytics account is updated with a new click.
If you want to track multiple ads at one time, just change the utm_content variable from ad1 to ad2 or ad3. If I’m tracking more than two ads, I’ll usually keep a spreadsheet going that includes the ad # and a description of the ad so I can tell which ad performs the best.
How to Review Your Google Analytics Tracking Results
Here’s another piece of the puzzle I completely skimmed over for about a year after setting up goals. There are a few ways to do this.
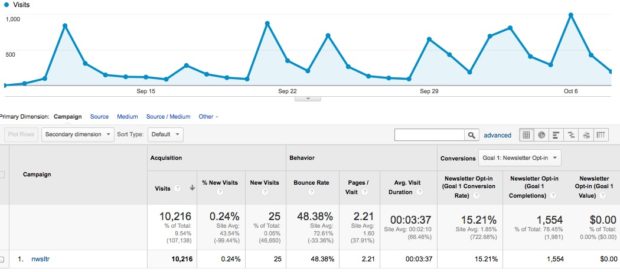
- Click on the Reporting tab in the orange bar at the top of your analytics dashboard. Under the Acquisition tab on the left sidebar you’ll see an option for Campaigns. Click Campaigns and from there you’ll see your different campaigns as you labeled them using the URL builder. You can also see your conversion rate, number of conversions and total value of the campaign to the right based on the goal that was completed.
- I find it much easier to setup a Google Analytics Dashboard. If you go up to the top of the sidebar on the left and click +New Dashboard, you can add widgets that will make reviewing your campaigns a breeze.
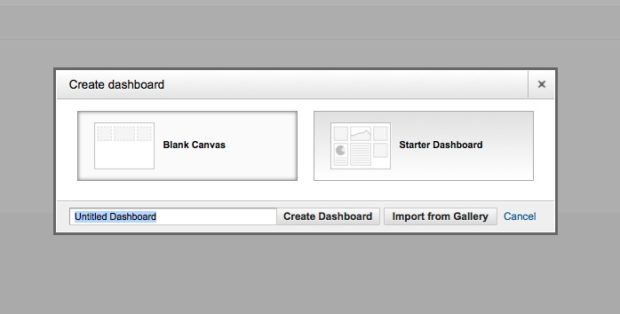
You’ll have to choose to start with a blank canvas or with a Starter Dashboard. I suggest using the Starter Dashboard as it makes it easier to get a feel for how the widgets work. Name your dashboard and click Create Dashboard.If you want, you can get rid of all of the widgets except the Goal Completions, like I’ve done below…
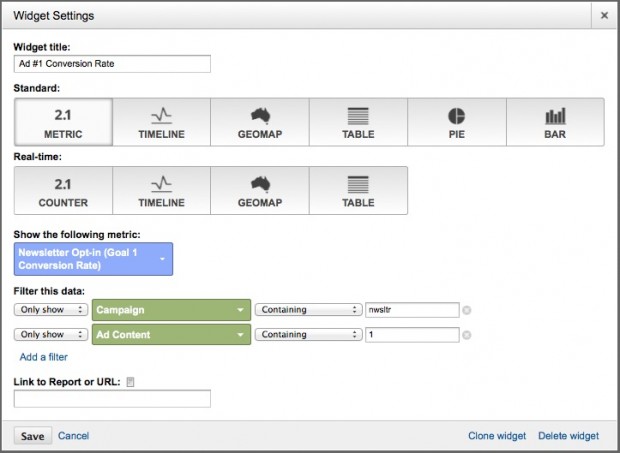
Then, hover over the Goal Completions widget and click the ‘Edit’ button (looks like a pen), you’ll be taken to the Widget Settings screen. From here you can change anything you want. The name of the widget, the type of the widget, the goal to track, metrics NOT to track, etc. For conversion rates, I find it easiest to use the 2.1 Metric setting as it just displays a percentage in number format. As you can see in the image below, I’ve changed my widget’s name and chose the goal I want to track.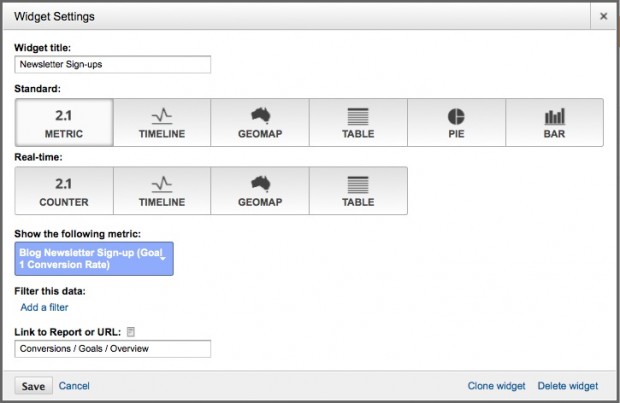
Once you click the Save button, you can see the name has changed, there’s no longer a graph and all that displays is a percentage. Perfect!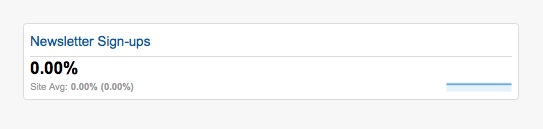
But how can you see the conversion rate of all of your different ads? I’ll show you, it’s pretty simple once you know how to work these widgets. In fact, I’ll show you the inside of one of my fully functioning dashboards…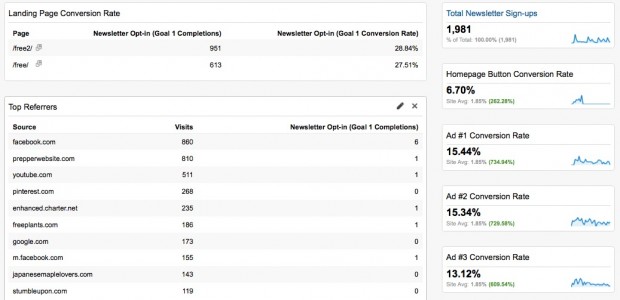
It’s hard to see but I have a bunch of stuff going on here… the conversion rates of our two landing pages, the total number of recent subscribers, and down the right hand side you can see four widgets displaying conversion rates for different ads I have running. Ad #1 and #2 are pretty close right now and Ad #3 is pushing its way down.So, to set your widgets up so they display only the conversion rate of a specific ad, go back into your Widget Settings by hovering over the widget and clicking the edit button (looks like a pen).
Now, leave everything the same but where it says Filter this data:, click Add a filter. Choose ‘only show’ in the drop down box, choose ‘Campaign’ in the green box to the right, choose ‘containing’ in the next box to the right and type the name of your campaign in the text box exactly as you have it in your tracking URL.
Then, click Add a filter again but this time, instead of choosing ‘Campaign’ choose ‘Ad Content’ in the green box, choose ‘containing’ in the drop down to the right and type the name of your ad exactly as you have it in your tracking URL. It should look similar to the image below…
Click Save and now you have a widget displaying the conversion rate of just the ad you selected.
Conclusion
The truth is, this is only the tip of the Analytics Conversion Tracking iceberg. You can get WAY MORE advanced. Like tracking which keyword searches get you the most conversions, which social media sites, which referral sites and the list goes on.
You can even create a dashboard, save it, export it and share it with other people! Yeah… do a search for Google Analytics Custom Dashboards. You’ll find some pretty sweet ones already created for you. All you have to do is adjust the goal tracking.
I hope this guide has helped you. I really love this stuff and had a blast creating this guide. I’d love to hear your feedback below. Questions, comments or even just an “atta-boy” would be awesome! I love to help, feel free to ask anything!